Incubating eggs is the 21 days process through which the egg hatches into a chick. Through nurturing, it grows into a chicken, and starts to lay egg. If you need o incubate eggs, you need to have an incubator. These days, it would be easier to acquire an incubator, since it is easier and cheaper when you want to buy one. When you want to have the best experience incubating eggs, ensure that you have the best incubator. Your choice will determine the effectiveness of your incubation.
Incubating eggs
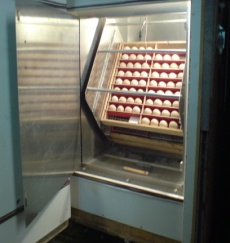
The process of egg incubation will take a period of 21 days. During this time, you need o ensure that the temperature of 37.5C all through the period. This is why it is important to have a good incubator with temperature regulator. In the later stages of the incubation, the eggs will start to produce their own heat. If your incubator does not have an automated turning mechanism, it is advisable to keep turning them. Note that the eggs are not 100% fertile, and they may hatch on a 55%-95% rate. Before you can put your eggs into the incubator, increase the chances for more chicks by ensuring that you have checked their temperature. It should be a holding of 99.5 – 103 degrees. Ensure to mark the eggs, for a guide when you are turning the eggs, on a daily basis.
Egg candling
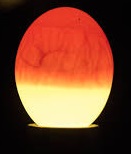
When you put your eggs into the incubator, it is hard to know if they are fertile or not. After one week, you will be able to determine the fertility of your eggs. Candling is an important step in the process of egg incubation, which will help to determine over heating your eggs. Once you have detected any clear, cloudy or eggs with blood rings, they should be thrown away immediately. Candling should be done in the dark, so that you can see all the eggs well, and what is in the innermost part. After a week, you will be able to see veins spread out like a spider web. The embryo can also be seen through. This will help to identify the fertile eggs, from the infertile ones.
Egg turning
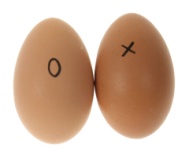
Depending on the type of egg incubator you have, turning eggs will contribute a lot to have more eggs hatching into healthy chicks. This applies for the incubators that do not have humid regulators. You will find it hotter at the top, than at the bottom. This will require you to turn the eggs about thrice daily, through the 21 days. If this is not done, you will have deformed chicks. Mark both sides on the egg, so that you can identify with the turned eggs, to ensure that all chicks have been turned.
Air space
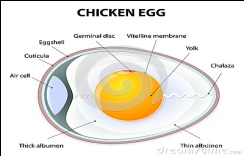
Once an egg has been laid, an air sack develops on the thicker bottom. The sack pushes the membrane away from the shell, thus leaving an air space. When you need to know of the development of the eggs, the chick will be seen with the head looking up towards this space. When the chick is ready to hatch, it will break through the space.
Hatching
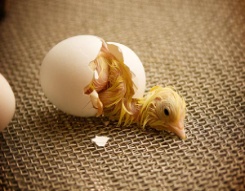
When the hatching period comes, you will notice the chick pips through the shell. It is important to note that the hatching period may take up to 12 hours so it is important to be patient. The chick will break into the air sack first, and then break through the shell for a full hatch. During the incubation period, it would be proper to ensure the right temperature and humidity. If it has been too high, from the recommended, the chick will not be able to break through the shell. In cases where the temperature has been lower than the recommended levels, the chick will be too faint to break the shell.
Hatched chicks
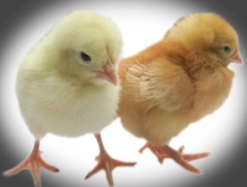
When the chicks have finally hatched, you will need to know what to do with them. With the assumption that you can see them hatching through the incubator, it is not advisable to take them out of the incubator immediately. The chicks need to dry of the egg fluids first, and then gain a bit of strength. From here, the chicks can survive for more than two days without water or feeds. This is because the yolk goes through the navel and to the stomach of the chick. This will help the chick to get nourishment even for two days. This is how the ‘day old chicks’ are distributed to vendors, and chicken farmers.
For every chick that has been hatched, it would be proper to ensure that you have given it a vaccination from bird related diseases. This can be done as the chicks come out from the incubator. However, you need to have the right equipment for immunization, lest the chicks will die.
What vaccinations do parrots get?
I Bought a small 2 layered incubator, 7 on each layer. do I put them small end up? or big end and then turn them during the day or do they have to be laying down? first time incubating, thank-you
You keep the big end up, that’s where the chicks head come from….
About turning i don’t have any experience in that because i have a hen which will do it by herself, so yeah.
Good Luck